Threw out old Netgear switch, installed a TP-Link one in kitchen cupboard, added a TP-Link switch to the cabinet in store room and moved my NAS there.


Threw out old Netgear switch, installed a TP-Link one in kitchen cupboard, added a TP-Link switch to the cabinet in store room and moved my NAS there.
Routed holes for cables in the top and also a hole for the fan also in the top.


I’m making a new network cabinet. Making is maybe not putting it correctly. Modifying an IKEA BESTÅ cupboard is more correct.

I drilled a hole for cables at its bottom and it came out horrible. There is no support for the guide drill so once past the thin shell it wobbles around and makes a huge mess. It will mostly be covered by the plastic tube with flange I will put into it.
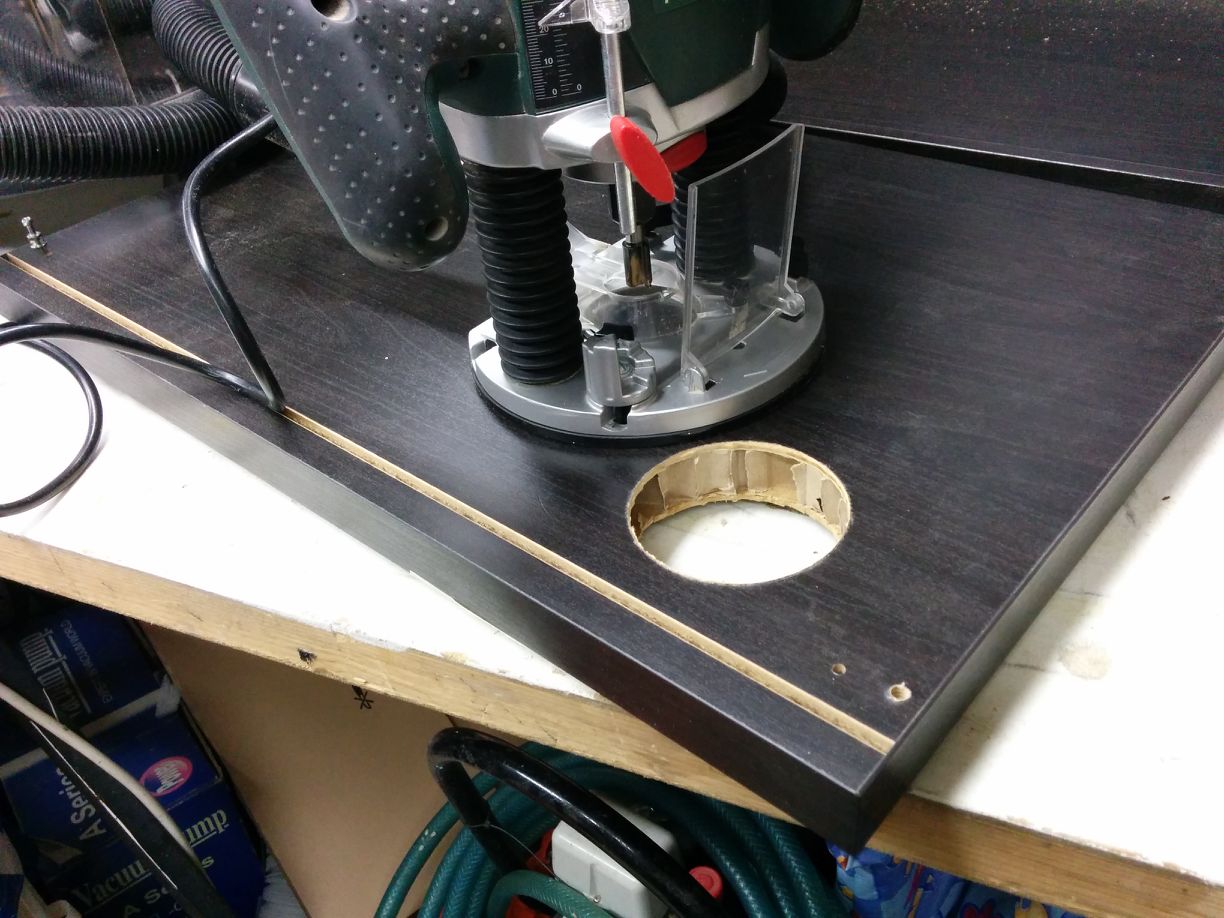
On the opposite side I used a compass to scrape a circle and then a router to plow out the circle. Much better result.
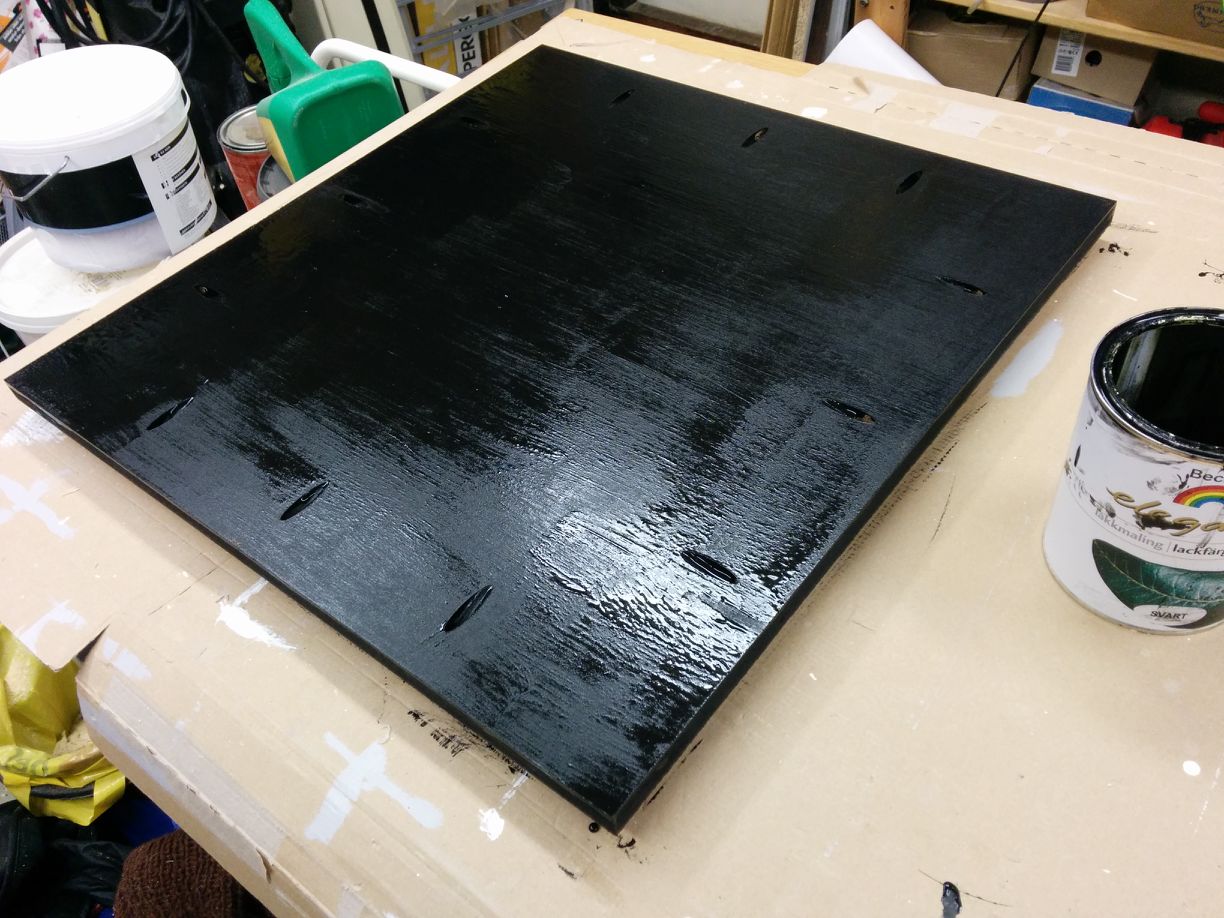
The back of is a thin hardboard with veneer on that is floating in grooves. To make the cabinet more rigid and also provide for something to drill into if something is to be mounted on back wall I cut a piece of MDF to a tight fit, drilled pocket holes and painted it (for protection, definitely not for looks).

I also cut up a piece of melamine to act as a shelf for the cabinet. I routed out four indents for the cabinet’s feet to stand in to prevent it from sliding off the shelf.

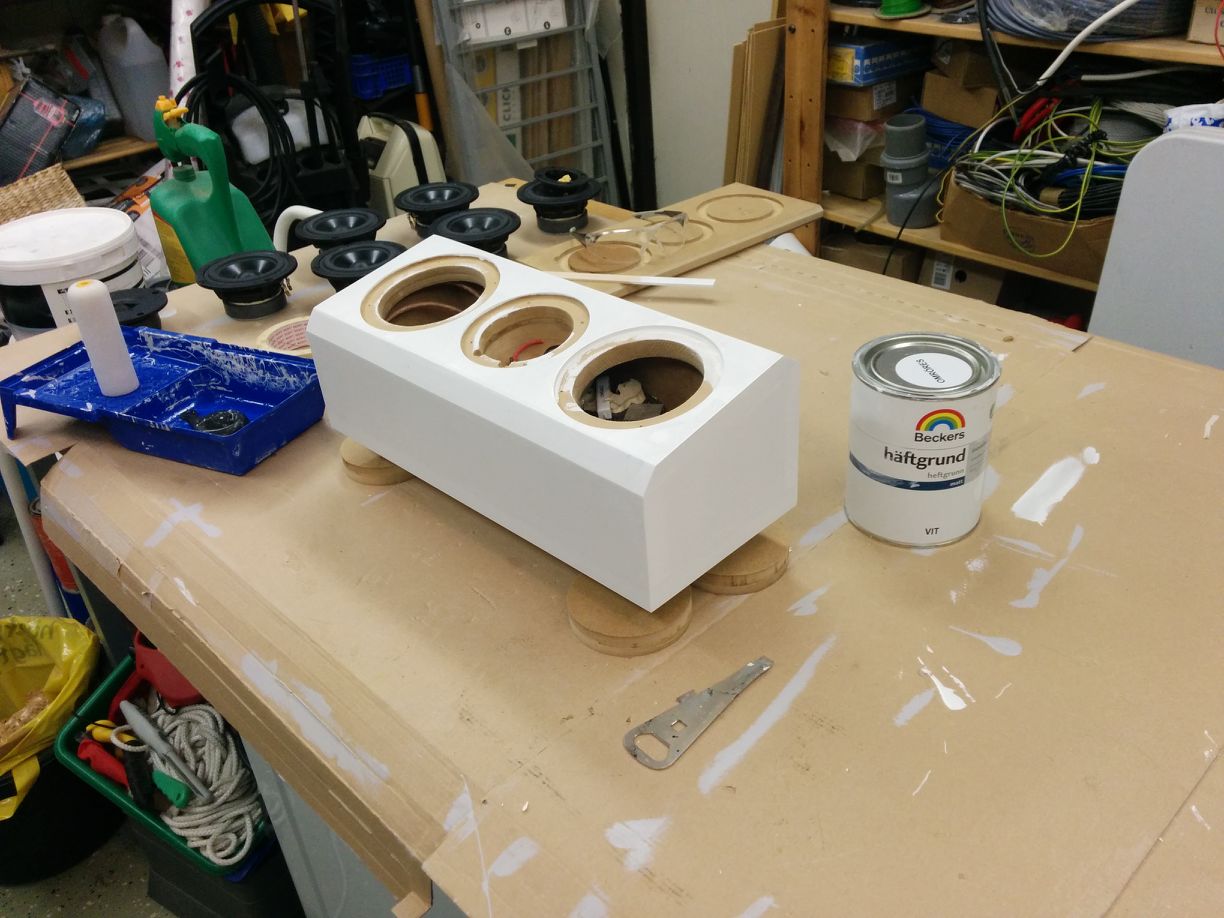
All three coats of paint is dry, the drivers are connected and mounted and it plays. Beautifully. Well balanced to the front satellites. I’m happy. I will let it lie on its back a few days to let the pain completely cure.

Filters glued in place. Very tight space. Some slight remodeling of capacitors had to be done to make it fit between the speakers.

Then moment of truth, gluing the baffle on closing in the wires and filters forever. I hope I have connected everything correctly.


Glued and nailed. I didn’t think that one through as the edges would get chamfered and the nails are at those edges. I used the router very slowly with a cheap router bit. Worked out ok.
Then sand and prime.
And that is all I have time for today. More sanding and priming next time.

I managed to extract the filters from the old center speaker, as well as the “ludd” that dampen the air in the enclosure.
I cracked the glue joint with a chisel and a lot of persuation. I dreaded that the three filters would be tangled together as one and I would have had to understand it.

Luckily for me there were three separate filters. One highpass for the tweeter and two bandpass (if I remember correctly) where the one for the outer speakers cut of a bit lower than the front ones. I traced the wires from the speakers and found (and remembered) that when first built the phase was wrong on the tweeter and we had to switch phase a few times until we found out that it was the tweeter that was out of phase. The wires had been swapped on the filter and when connected according to the markings it became inverted. The filters were glued to the lower box which had a aluminium sheet at the bottom for some unknown reason (can’t fathom what difference it would make as it isn’t magnetic). Strong freaking construction adhesive. But with some careful chiseling I pryed them free.

I hade to rearrange a few components on the filters to make them fit into the small space behind and between the speakers. This is the way they must be positioned.

Just added a hole for router lift and then toyed with Blender to make it look pretty.

Worked some more on the workbench design. Base is as wide as the bench top. Cabinets designed and drawer fronts added. The cabinet supporting the saw is rotated. I plan to put table saw accessories therein.
My angled cuts were not perfect and there was gaps when laying the baffle on it. I glued a bunch of sand papers to a piece of hard board to have a large abrasive pad that lay flat on my table.
 I then pushed the enclosure over it until the edges lined up.
